Polarizing Filter Guide: Why I Really Love B+W Filters
Giant iceberg, photographed with a polarizing filter, on the Ilulissat Icefjord, Greenland.
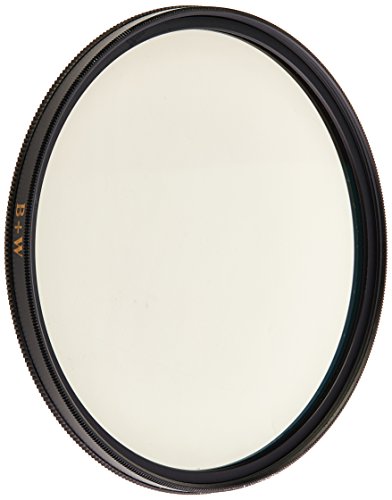
B+W filters are the best filters I have ever used. Made in German by Schneider I'm happy in the knowledge that, unlike cheaper plastic ringed filters, B+W filters won't lessen the quality of my expensive Sony lenses.
As a case in point, take a look at his epic photo of a gigantic iceberg, photographed under the midnight sun, on the Ilulissat Icefjord near the town of Ilulissat in Western Greenland.
The bright, low-angle sun was reflecting off the iceberg and causing me to squint. As a result, a lot of the color and fine texture was reflected off the surface of the iceberg.
Thankfully, after careful adjustment of my B+W polarizing filter, I was able to eliminate the reflections and produce the colorful, highly textured image you see here.
I Use B+W Polarizing Filters Exclusively
Made to the highest of standards, from arguably the world's best optical glass, it's worth considering filters that incorporate the B+W F-Pro filter mount.
The result is a thinner design that helps prevent vignetting, even on wide angle lenses, including most 24 mm focal lengths on full frame camera bodies.
B+W filters are made to last and are encased within a brass ring.
This helps ensure that the filter won't become cross threaded if screwed on too tightly to your lens, a common and potentially expensive problem with cheaper filters that utilize plastic threads.
Polarizing filter retained the details and vibrant colors within this beautiful flower.
Why I Use A Polarizing Filter
I employ a polarizing filter for 3 very specific reasons, which I’II outline as follows:
1. Polarizing Filters Increase Color Saturation
Polarizing filters can help to increase color saturation (i.e., the intensity or purity of a color) and maintain fine textures under bright light conditions.
It’s at such times that color and texture could otherwise be reflected off the surface of the subject (e.g., wall, leaf, rock), and away from the lens, resulting in flat, lifeless images.
I remember being captivated by the vibrant colors and intricate design of this beautiful flower inside the Flower Dome at the incredible Gardens by the Bay complex in Singapore.
While the light was already somewhat diffuse inside the dome, employing the polarizing filter did wonders to increase color saturation and more fully render the finer details within this beautiful flower.
Polarizing filter showcasing the verdant Tegallalang rice terraces near Ubud in Bali.
2. Polarizing Filters Reduce Reflections
Polarizing filters reduce reflections off non-metallic surfaces.
Reducing reflection in this way might enable you to photograph window displays, or someone swimming under water, without harsh reflections on the surface of the glass or water messing up your picture with irrelevant detail reflected from outside the picture frame.
It's just like wearing polarizing sunglasses on a bright day.
If the sun’s behind you and reflections from sand, snow or water are causing you to squint, then it's probably a good day to employ a polarizing filter.
However, if you’re squinting while photographing into the sun, try turning around and photographing in the other direction.
It may not be the composition or the effect you’re looking for, but it’s going to be easier to take a decent photo.
I loved my visit to the lush and verdant Tegallalang rice terraces near the town of Ubud on the island of Bali, Indonesia.
As you can see, it’s an extremely picturesque location.
However, it was really bright and sunny when I visited and, as a result, the scene looked a little lifeless when I removed my polarizing sunglasses to take a photo.
It was obvious that, to produce an acceptable photo, I’d need to place a polarizing filter in front of my lens and, while carefully watching the effect change through my camera’s viewfinder, rotate the filter until the desired result was achieved.
That simply process is important.
There are times when the filter, at full polarization, can produce an effect that’s simply too colorful for a discerning audience.
You see, just because you can doesn’t mean you should.
Just remember, spin the filter until you get a pleasing result. If you go too far, simply spin the filter in the opposite direction, or continue to rotate it until the desired result is achieved.
Golden detail at the Palace of Versailles photographed with a polarizing filter.
3. Darkening An Already Blue Sky
Polarizing filters are probably most commonly used to deepen (i.e., darken) the color of an already blue sky and, as a consequence, emphasize the shape and texture of clouds.
That’s pretty well showcased in this photo of a beautiful, golden detail on top of the visitor entrance gate, at the glorious Palace of Versailles, just out of Paris.
I made the photo, from a low viewpoint, with a B+W polarizing filter to add extra saturation, visual separation and drama to the scene.
A polarizing filter is actually two pieces of glass sandwiched together. To use the filter, simply screw the inside end securely onto the front of your lens.
As previously stated, it's then simply a matter of turning the outside filter ring, while looking through the camera's viewfinder, until the desired effect is achieved.
The degree of polarization that occurs is achieved by noting the outer glass element in relation to the inner element which remains fixed in place.
Cross photographed with a polarizing filter at La Recoleta Cemetery, Buenos Aires.
Compromises Associated with Polarizing Filters
I made this photo of a sunlit Christian cross, against a deep blue sky, at La Recoleta Cemetery in Buenos Aires, Argentina.
I love the strong color contrast between the warmly lit stone and the cool, blue colored sky.
The direction of the light is the primary factor that determines whether or not a polarizing filter works.
If you find yourself turning the filter, without noticing any changes to the way the image looks, then take it off.
It's also worth noting that a polarizing filter, as it's actually made of two pieces of grey glass, absorbs light.
Depending upon the circumstances, that loss of light could, potentially, adversely effect your photo as follows:
A lower shutter speed, increasing the risk of camera shake or subject movement.
A physically wider aperture, potentially compromising depth of field in the photo.
A higher ISO, potentially increasing the likelihood of noise in the resulting image.
Keep Your Filters and Lenses Clean
Be aware that a dirty filter will likely result in reduced contrast and image sharpness.
Be particularly careful when actual light sources (i.e., street lamps, sunrise and sunset) are including in the composition.
At such times a blooming, or spreading of the light, and a smearing of color can appear in photos made with a dirty filter and/or lens.
Remembering to keep both the filter and the front element of your lens clean is, therefore, essential to extract the best quality from your lens.
B+W filters incorporate a special Multi-Resistant Coating (MRC) which provides the filter with a water and dirt repelling coating.
This coating helps keep the filter cleaner for longer and, when cleaning is required, makes it easier to do so.
The MRC coating also reduces internal reflections, between the filter and the front element of your lens, resulting in reduced occurrence of flare and ghosting in your photos.
Buildings reflected in a pond in Hongcun Village, Anhui Province, China.
When You Don’t Want To Use A Polarizing Filter
Of course, there are plenty of times when you don’t want to use a polarizing filter. This serene scene from the famous Hongcun village in China is a perfect example.
The success of the photo is due, at least in part, to the reflections of the traditional village buildings in the water.
Using a polarizing filter may well have reduced or even eliminated those reflections.
Just between you and me, a close examination of the water revealed it to be quite a filthy pond.
Fortunately, the reflection of the surrounding buildings transformed the surface of the water from mirky to picturesque.
I know there are plenty of folks out there who leave their polarizing filter on all the time.
The notion being that it’s there when they want it and the effects of the filter, when not required, can be negated by spinning it until no change is visible through the camera’s viewfinder.
I get it, but I don’t recommend working that way.
When the filter’s not being used to polarize the light it’s still a barrier blocking light from reaching your camera’s sensor.
That loss of light could result in camera shake, unwanted subject movement or a reduction in depth of field.
Actually, I keep a B+W filter on my lens at all times. Usually it's a UV filter but, when its time to attach a polarizing filter, I swap one for the other.
Please, avoid stacking traditional screw-in filters on top of each other.
By doing so you'll be courting poor quality results and the likelihood of vignetting, noticeable as a darkening in the corners in your photo, will increase.
Surely that kind of effect would defeat the purpose of buying great glass (i.e., lens and filter) in the first place.
Used correctly, and under the right circumstances, a polarizing filter can really make a difference to your success as a photographer.
And that's why I always carry a B+W Polarizing filter in my own camera bag.


